This post was written by my awesome mother, Kathy.
A while back, in a post on personalized holiday gifts my mom left this comment that prompted many requests for the recipes:
“Another way to decommercialize Christmas or any holiday is to get together as a family and create homemade decorations for the Christmas tree and the home. It can be done while sharing a meal together and brings a sense of the elusive Christmas cheer that we seek so hard to recreate in our lives from the television commercials while at the mall spending our hard earned dollars on decorations and gifts. One of Matt’s personal favorites is to make paper chains out of colored construction paper. One of mine is to create salt dough ornaments with cookie cutters and then after baking them, paint them and spray them with some sort of lacquer. They last for years and every year that I unpack them and carefully hang them on my tree, I am taking a trip down memory lane and remembering the warmth and satisfaction of sharing such an activity with my family.”
So as requested… here are the recipes for three of our favorite homemade Christmas decoration traditions from my childhood. Feel free to adopt these creative and frugal activities and making them your own. Involve the kids, involve nieces and nephews, siblings and cousins, parents and grandparents, etc. Everyone is going to love getting together to enjoy this good old fashioned frugal family fun!
My wife and I are planning to throw a homemade holiday decoration party for both sides of our family this year. Not only will this serve as a great time of family togetherness, but will also provide a lasting example of the power of frugal living.
Homemade Salt Dough Ornaments (Mom’s Favorite)

Salt dough is very simple to make, so I will share the recipe that I have had for years, that is handwritten by my sister on the back of a business card!
- 4 cups white all-purpose flour
- 1 cup salt
- 1½ cups hot (hottest tap) water
Dissolve the salt a little in the hot water, then mix in the flour. That makes a nice dough that is very easy to handle. Sprinkle flour on your countertop to avoid the dough sticking. Use a rolling pin and roll it out (you can also use any smooth cylindrical glass container like a peanut butter or beverage bottle).
Roll the dough to about ¼ inch thick and use cookie cutters to make the shapes you like, depending on the season (don’t limit this to Christmas!). Transfer cut ornament shapes to a cookie sheet. Poke a hole in the top of the ornament that will serve as a way to tie ribbons for hanging the ornaments when they are finished (a Phillips screwdriver works fine). The ribbon can be the type of ribbon one uses to wrap gifts with, the kind that you can curl with a pair of scissors.
Bake the ornaments at 325° until they are hard. This will usually take 30-40 minutes, depending on how thick they are. It is important to make sure they are completely dried out so there is no mold. It is also important to remember that if you are creating these ornaments with small children, perfection is not important! Encourage them to do the best they can and appreciate their efforts!
Let them cool. Then, I just use cheap acrylic paints and paintbrushes and paint as creatively as possible! Acrylics are water soluble so don’t worry if the kids make a mess… it’ll clean up! Use a different paint brush for each color and let each color dry before applying a different color. The acrylic paints do not take long to dry. If you are making several ornaments, just apply the same color to each one and by the time you are finished you should be able to go back and start another color.
Usually I just paint one side with detail and the back side just one plain color. You can get as detailed as you want with these. After the paint dries, lay them on some waxed paper, preferably in a well ventilated area and use a spray lacquer of some sort to spray both sides in order to preserve them. You must spray one side, let it dry, then spray the other side. You can get the lacquer in any paint department. Use waxed paper because the lacquer will stick to newspaper. Do not include the kids in the lacquer process, just do that part yourself.
Tie a ribbon in each one and vóila! You have Christmas ornaments and lots of memories. You’ll also most likely have a new family tradition on your hands because this process has the wonderful peripheral benefits of encouraging family togetherness and creativity!
Construction Paper Chains (Matt’s favorite)

Making paper chains is also a wonderful activity to do with small children. Matt always loved making these and part of the reason was that he loved making the homemade glue. Guess he even loved making homemade products way back then!
Get yourself some rectangular colored construction paper and lay out in landscape position. Using a pencil, draw out 1 to 2 inch strips and cut accordingly.
To make the glue simply mix together:
- white all-purpose flour
- cold water
- few pinches salt
Use as much water as you need to make it into a thick glue-like paste. If you do not want to make your own paste, or find this doesn’t stick or dry well enough, Elmer’s makes a non-toxic glue for kids.
Glue the first one together at the ends, making a circle. Then take the second strip, lace it through the first circle and glue that together at the ends, then proceed the same way until you have used all of your strips and made a chain long enough to drape around the tree or to festoon your living room!
Popcorn and Cranberry Strings
Our family also used to make popcorn and cranberry strings. These make great decorations for the Christmas tree inside the house, or, if you have an evergreen tree in your yard you can decorate the tree to feed the birds and squirrels!
All you will need is:
- some strong thread
- a needle
- popcorn (microwave variety will not work well for this project)
- a bag of cranberries (produce aisle at grocer)
To make, simply pop some corn in a pan on the stove with a little oil or with your air popper. Grab your cranberries, needle and thread and begin threading your needle alternately through a cranberry, then a couple of pieces of popcorn, a cranberry, a few popcorn, etc. until you have created a string long enough to wrap around the tree. Don’t forget to tie large knots at both ends of your string in order to keep the cranberries and popcorn in place.
What about you?
Did you make some cool holiday decorations growing up? Don’t be a Scrooge… share the recipe!
*******

On the Homemade Salt Dough Ornaments please remember to never store them in your attic after Christmas. We made these about 20 years ago in Texas and they were some of our favorite memories on our tree every year. Until about 5 years ago they some how got put up in the attic with all the other christmas ornaments and they melted.
Aww. Memories! We made so many of those salt dough cookie orniments as kids. They lasted a long time.
On topic of snowflakes:we used to make ours out of coffee filters and used food coloring to dye them. (food coloring left over from Easter eggs)
I love the dough ornaments. When my child was small, we made Sesame Street Ornaments. They turned out great, very colorful little Bert and Ernie, Cookie Monster, Big Bird, and all the rest for our Sesame Street Christmas Tree. To make them look festive and in season, we put little candy canes in their hands or some holly with berries on them. Our tree was so much fun as well as making the ornaments. LOL My tip is… Don’t put them in the attic with the other Christmas decorations.
Why not, do they cook in the heat up there and misshape or what?
My idea originates from a family who cut snowflakes the first year because they didn’t have the money to buy ornaments. The woman said they saved them flat between cardboard and they kept adding to them each year – visitors, friends, etc. As the years went by realized they had snowflakes from their children at various ages and from loved ones who had passed away.
I realized I hadn’t cut a snowflake for years and grabbed some small scissors and computer paper at hand and began to cut. Before I knew it a couple hours had passed with a mound of snowflakes and an incredible mess of scraps all around me. My husband cut a few, my grandson a few, our daughter… It’s infectious.
Looking at my stack of flakes I decided to sign & date them & use some of them for Christmas cards. I looped a piece of crochet thread through a hole and placed a gently folded flake inside a letter or around a piece of card stock with my Christmas wishes for them gracefully written on it and mailed them. Everyone loved them and I even received a few snowflakes in return cards. This year as I was cutting them I loved the peace of doing them as my schedule allowed, coming back to it again and again. I loved not having to go to the store and stand in front of a rack of commercially made cards and choose.
I will love the new ones we add to our collection this year. You can use them to make garlands, hand them in the windows, on the tree…. a million different ways.
All you need is paper (lightweight works best) and a small pair of scissors and some pretty string to hang them….and a broom to sweep up the bits of paper when your “snowfall” ends.
I just wanted to suggest that you tie a bead or button at the end of your popcorn string to ensure the popcorn doesn’t come off.
Yes I love some of your ideas. What I love to do is get some branches and spray paint them gold, put them in a decorative pot and put some colourful fairy lights on them!! I also love to get old baubles and put glitter etc on them!! 🙂
Great suggestion, Betsy did this and has the branches displayed as our table centerpiece.
My sweet grandmother told me stories about how they used to decorate trees way back in the day. They collected Queen Anne’s Lace flowers and sprayed with a little shellac, covered with wax paper or a paper sack laid flat. They then put them under the rugs in the house. At Christmas time they were removed and made beautiful snowflake looking ornaments. Many crunched up but they just placed this all over the tree as well.
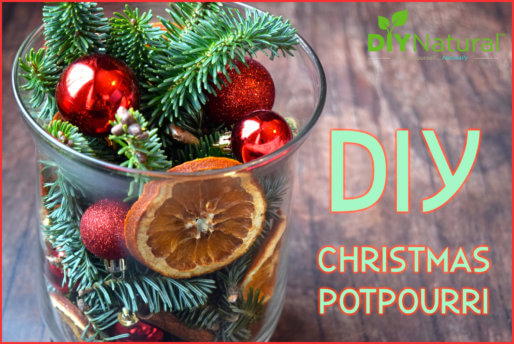
I have been making homemade orange pomander balls for about 25 years now and would like to submit that if anyone would be interested. It’s a bit long so bear with me:
This is my own recipe perfected over the years. I’ve been making them & giving them away for over 30 years even giving the recipe away to anyone who wanted it. It’s very simple. First lay 2-3 sheets of toilet tissue on a table crosswise on top of each other. Oranges are studded with cloves then one by one the oils of cinnamon, cloves and orange are drizzled over the freshly cloved fruit. After each oil is added roll the orange in a powdered mixture of spices with a fixing agent (recipe below) followed by more oils until orange is thickly covered with powder and oils. When your pomander’s scent begins to wane you may add more oils to freshen it again if you like. Caution: when adding oils to the orange be sure to wear plastic gloves as they are very irritating to your eyes & mucus membranes & by the time you’re finished your fingers & nails will be black for a few days. This is not appropriate for children to do for the same reason. You may also use a lemon instead, substituting oil of lemon for oil of orange or you may use both. Also you can use a grapefruit, lime, tangerine, etc. Just experiment. Another thing: The first pomander I made I found out you don’t need to cover the entire planet of the orange with cloves. You can put about 30 or 40 on it in circles or designs & that’s usually enough. As you pierce the skin of the fruit it’s easier to do with a small nail then insert the clove. Now that you’ve covered your orange with cloves and spices place carefully on top of the tissue. Wrap the first layer around the orange. Now bring the next layer of tissue around the other side and then once more with the last layer. It should be completely covered with tissue so none of the powder will escape as it ferments. Now you may wrap it with burlap or another lightweight material & tie with a ribbon or raffia. Now place in a closet, under the passenger side of your car seat, in a linen closet or in a basket in your home. I make several for Christmas to give as gifts placing them in a basket to give as I have guests over. Now every day for the next 8-10 days, turn your pomander from side toside as it is fermenting & oils are dripping downward. If you’re expecting company, place the orange in a basket opening the ribbon letting the wrap open up to expose the studded clove. The scents of oranges, cinnamon and cloves will fill the air. As guests leave, wrap it up again the same way & place back in the closet or where you had it before. Just turn every day.
Powdered Spices (to roll cloved orange in: recipe above)
powdered cinnamon powdered nutmeg powdered cloves orange peel lemon peel
fixing agent: either powdered orris root or powdered oak moss (this helps hold the scent otherwise the fragrance will not last long at all) The fixing agent is similar to what a perfume in it in order to hold it’s fragrance.
Wow Gena, thank you so much for sharing this info, it sounds amazing and I’m sure it will be a blessing to many!
I’m so excited to be able to finally share something!!! I’ve been making these two things all my life and people absolutely love them…They make great teacher gifts *hint hint…(I’m a teacher!)
Cinnamon Ornaments
1/2 – 3/4 cups applesauce
1 cup cinnamon (buy in bulk)
1 Tbsp of each – ground cloves, nutmeg, allspice
Mix and roll dough out on cinnamon covered wax paper and rolling pin with cinnamon. Cut with Christmas cookie cutters and use an ice pick to poke a hole for a ribbon to hang them on. Let air dry about one week; turn them over a couple of times. These smell AAAAAMAZING for months! A friend of mine actually hung it from her rearview mirror and said her car smelled great.
NEXT!
Spice Bugs for really great apple cider
-Medium oranges – juice them (drink the yummy fresh juice and use a grapefruit spoon to scrape out all of the guts.
-Dry oranges for 8-12 hours at lowest oven setting.
-Fill with light brown sugar
Make a bug with Alll spice eyes, cinnamon stick for body, nutmeg head and whole cloves as legs. I think you can imagine it but it basically has a long skinny body with a HUGE head and tiny eyes and legs. He’s a really cute little guy.
-Wrap snuggly in saran wrap and tie off with a ribbon with this recipe attached:
Instructions: Simmer in 1 1/2 – 2 quarts of apple juice for 30 minutes. Serve hot.
Enjoy and Happy Holidays!
Stacy… you rock! Thanks for the great recipes.
I made salt dough ornaments for the first time last year, but they always crack, and not just little cracks, deforming cracks that make the ornaments seem brittle. I’ve tried making them thicker but the cracks just end up thicker too. Any suggestions??
You need to finish them with a good lacquer which you can find at your local hardware store – I would use a spray lacquer.
Chytsta, I think you might be referring to before you even get to the point of lacquering them. Make sure you knead the dough well, for at least 5 min until it is smooth, this helps to build the gluten and decrease the cracking (fingers crossed) good luck!
This is all great stuff! But here’s a hint for stringing popcorn. Pop it the day before and let it get stale. If you try to do it with freshly poped corn it will break to pieces when you try to skewer it with a needle.
Excellent advice Kristy, thanks!
This is fun. Our first Christmas we were married we didn’t have much money. We were given a small 2′ tree. We bought a bag of Hershey Kisses in the Christmas colors, red, green, and silver, and a cheap bag of ornament hooks. We stabbed the hooks through the chocolate kisses and hung them all over our tree. They were the perfect small size, and so festive and cute. We got lots of compliments on our kiss tree.
I might try the dough ornaments. I have some cute Christmas cookie cutters I have collected over the years. My little daughter would have fun with that.
Make a cinnamon apple fragrant tree ornament. You can also use this recipe as an air freshener. Follow the link there is a SLIDESHOW included with step by step pictures. http://www.examiner.com/children-s-crafts-in-st-louis/cinnamon-apple-fragrant-tree-ornaments
This is great info. I’ve always wanted to know the salt dough recipe.
One year, my stepdaughters made ornaments for our tree. I was a photography student (dark room era). My oldest step daughter used one of my photo paper boxes. The inside is very black. She cut a square from it, punched a hole in the top, and used white, pink, and light blue crayons to draw on a figure. I still open the Christmas ornaments and delight in hanging those old ornaments.
Sometimes nothing beats the fun and satisfaction of making something yourself, especially when talking about Christmas ornaments.
.-= Tim @ Vintage Christmas Decorations´s last blog ..Vintage Christmas Decorations and Ornaments updated Tue Nov 17 2009 3:56 pm CST =-.
Very cool. Thank you for the recipe and holiday decoration tips. Definitely going to do the salt dough ornament thing again. I have salt dough ornaments from my kids about 5-6 years back – it was a single mom’s way of being festive. And they are my most cherished ornaments, too.
And easy way to poke a hole in the ornaments before they go in the oven: a straw works great. Tip I learned from my mom. 😉
.-= Money Funk´s last blog ..Selling Everything Progress =-.
Aren’t they awesome!
I love this post…It brings me way back to when I was a little guy, making homemade Cristmas ornaments with my Mom and fudge with my grandma. Actually, my grandma’s super-secret recipe that she made for all the friends, family and neighbors was “Bird-Turd Cookies” — (they were actually much tastier than that sounds).
Now that I’ve spoiled the party, thanks for the recipes and great ideas for my kiddos this year!
Happy holidays everybody,
Jay
Aw! Love your mom. Can I be in your family? LOL
We love to do homemade crafts for the holidays, and the kids like to make things to give to other people.
I love making paper chains. 🙂
.-= Kelly Whalen´s last blog ..one car experiment: part 2 =-.
C’mon over… the more the better! 🙂
Oh, thanks Matt & Mom!!! I’m loving the ideas and hope to create some memories of my own this holiday season. What an awesome idea. It’s amazing how the most simple of things are not that obvious at times. Like seriously, I never thought of doing anything like this. Thanks a bunch!
.-= Lydia aka Ms. MoneyChat´s last blog ..798 … So What =-.
You guys are quite the arteests! =) Good stuff and going along with your post from the other day – there is something about homemade gifts (in this case ornaments) that brings about happy lifetime memories!
This is a great way to invest into family time as well!!
.-= Jason @ RedeemingRiches´s last blog ..Restore Your Money – Renew Your Mind =-.
This post gives me the same feeling I get while watching Jimmy Stewart in It’s a Wonderful Life! It’s great to see people responding to de-commercializing Christmas ideas! I was working in Louisiana one Christmas, away from home. I had no Christmas decorations, not one! There were some awesome large pine trees in the parking lot of the apartment complex where I lived, and they dropped these mega pine cones. So, I went and gathered them up, bought some glue and different colors of glitter, and created some beautiful, sparkly, festive ornaments from Gods bountiful nature! I still have some of them to this day!
Great holiday ideas! I also like to get inexpensive clear glass ornament balls from the craft store and fill them with red and green glitter, ribbon, or any other holiday-themed things I can find. The glitter sparkles in the Christmas tree lights and it looks really pretty.
Matt – I LOVE your homemade series! They rock! So cool man. You sure you wrote these? haha.
Len is right, brings back memories… but they aren’t too far, b/c holiday season is a coming! Best time of the year is here!
ps if the christmas tree in the picture is kinda crooked. may want to fix it.
Best,
FS
.-= Financial Samurai´s last blog ..The Samurai Mask: An Interview With The CEO of BULLDOG Gin =-.
Oh my gosh, did this post bring back some happy memories for me!
Len
Len Penzo dot Com
.-= Len Penzo´s last blog ..A Primer to Help You Unravel the True Meaning of a Dollar =-.