A Staple in My Diet
For almost 12 years, I ate half of a PB & J sandwich every day, 5 days a week. I was in charge of packing my own lunch from 1st-12th grade, and PB & J was my culinary specialty. Peanut butter was a favorite of mine, and my mother encouraged it as a protein source since I was picking out every minuscule bit of meat she added to family meals. (One too many rubbery bits in my chicken nuggets caused me to be a vegetarian during childhood.)

Mmmmm… peanut butter. So much better than beak and toenail chicken nuggets.
Growing up, I remember having the oil-on-top, sawdust-tasting, have-to-vigorously-stir-it-with-a-spoon-without-spilling-oil type of peanut butter in the fridge. This was for Dad. Nobody else touched it. The kids’ peanut butter in our house was creamy, sweet, lick-your-lips-good, and always embellished with some cartoonish picture to make us love it even more.

I used to love that cute little flying silhouette.
The problem with the tasty peanut butter from my childhood is that it (not so astonishingly) has some nasty added ingredients. When I look at the back of a peanut butter jar these days, I see the likes of sugar, hydrogenated oils, and other things that should never come near my PB & J. Even Natural Jif has to be called a “spread” because it only contains 90% peanuts. Imposter, I say!
Now the Peter Pan peanut butter label even has to boast, “NO high fructose corn syrup!” Why? Am I suppose to expect this ingredient to make an appearance in my peanut butter? Sad.
I eventually had to get real about peanut butter. And “real” does not include sugar, cartoonish pictures, or hydrogenated oils.
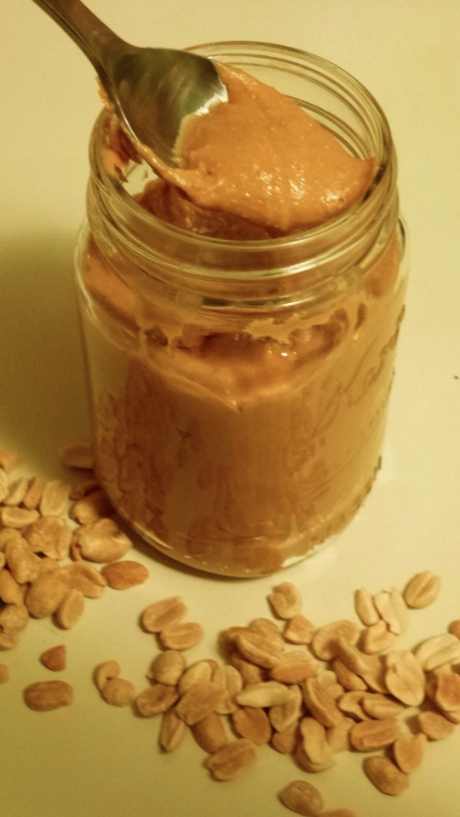
Peanut butter is still a part of my diet, and now I make my own delicious, creamy variety at home. I keep it simple… after all, it’s just peanut butter.
Peanut Butter Made Simple
All you need for a great peanut butter is peanuts. I know… it seems too simple, but that’s how it should be. Depending on your tastes, you can also add a little oil, a pinch of sea salt, or a bit of raw honey if you like yours sweetened.
Choosing Your Peanuts
Rule 1: Be particular about your peanuts. I recently looked at a container of peanuts innocently resting in our cupboard, thinking I would just find “peanuts and salt” under the ingredients. Instead, to my horror, the list of ingredients included things like monosodium glutamate (MSG!), sugar, maltodextrin, corn syrup solids, hydrolyzed soy protein, and other ingredients I was not prepared to see. (Just another example of how reading labels is a complete eye-opener!) The unopened peanuts were returned to the store on my next shopping trip… and I may or may not have gone on a short rant in front of the grocery store clerk when asked my “reason for returning.” (She was not amused by my peanut dissertation.)
Rule 2: Choose any type of peanut you are comfortable using. You may prefer organic, dry roasted, salted, unsalted, or the cheapest kind available. But again, I’m passing along the lesson I learned… CHECK THE INGREDIENTS. A container of dry roasted peanuts (or other variety) may have additives you are trying to avoid in your peanut butter. Purchasing bulk peanuts is usually cheaper, but check the ingredients on the bin to be sure you’re getting what you want.
How to make your own

Ingredients & Supplies
- a high-speed blender (I use my VitaMix) or a food processor
- spatula (like this)
- container for storing peanut butter (this recipe fits perfectly in pint sized mason jars)
- 3 cups (24 oz.) peanuts (find organic nuts here)
- any additional items you may desire (honey, seeds, sea salt, oil, etc.)
*If using raw peanuts, you may need to add about 2 teaspoons of oil per cup of peanuts.
Directions
1. Dump peanuts and any other ingredients you are using into blender or food processor. Secure the lid.
2. Turn on machine and blend on highest setting until peanut butter begins to move freely through the blades.
VitaMix users: Push peanuts into blade using the plunger while blending. Stop processing when peanut butter begins flowing freely through blades and the high pitched motor sound changes to a lower pitched sound. In my VitaMix, I am careful not to process for more than 1 minute after butter begins flowing freely or the machine could overheat.
For food processors or blenders that do not have a plunger: You may need to stop the machine once or twice during blending to scrape down the sides. Continue blending until desired consistency is reached.
3. Stop machine, scoop peanut butter out of your machine with spatula and refrigerate in an airtight container. Yields about 2 cups. Refrigerated peanut butter will last several months.
Additional Notes
- If you’re feeling ambitious, go ahead and roast your own peanuts to be made into peanut butter!
- Be sure to use peanuts that are as fresh as possible, or you might end up with an “old” peanut taste in your peanut butter.
- If you prefer crunchy peanut butter you will want to stop blending before it is moving freely through the blades of your machine.
- The color of the peanut butter will be different depending on the type of peanut used. (I say this so you don’t think there is something wrong with your peanut butter when it doesn’t look exactly like store-bought.)
So instead of processed, mass produced, commercial peanut butters, experiment with this simple recipe and let us know what you think!
*******


Hey! I totally agree with you on the store peanut butter stuff. We were big Jiff fans until we tasted real peanut butter we’d made ourselves: no contest, and it’s almost cheaper to make it ourselves than to by it at this point!
I saw a post that said that you can use a grain mill for really creamy peanut butter. Have you used one before, and is it better/worse than using a Vitamix? I know some people who use food processors and such have said that they had to add oil to their stuff but the grain mill guys didn’t need to for their peanut butter.
Very interesting John! We have never tried making peanut butter with a grain mill, so can’t comment on this. If you try it, be sure to return and let us know how it worked for you!
If you do use a grain mill be sure that it’s capable of grinding oily grains or nuts or you will clog and/or damage it!
Thanks for piping in on this one Cheryl! 🙂
I’ve never had anything but store-bought peanut butter my entire life! It looks easy enough to DIY peanut butter… maybe I’ll try it some day =)
It’s just that easy! You SHOULD try it some day!
Hi
Just wondering how much this recipe makes in terms of oz? Is it 24 oz finished or does it get reduced down?
Good question Madison. Three cups of peanuts blended up makes about 2 cups (1 pint) of peanut butter.
Thanks for this recipe! I successfully made my own peanut butter from scratch! Here’s how it went: http://www.creativesimplelife.com/peanut-butter-from-scratch/
What is a good price for peanuts? What is a ” stock up” price? Thanks!
Depends on the area you live in, but I used to stock up when I saw 16 oz. of peanuts for $2.50. (These were not organic though.)
When we lived in Africa, we would have peanut butter ground for us in the market. The best was with a really dark roasted batch of peanuts. Oh, delicious. I can now do that in my own oven (I have a new food processor, too!). Can’t wait to try it.
Just completed my second batch of peanut butter, this time with coconut oil, in my Ninja Kitchen System. I think the coconut oil adds just a little bit of sweet, so I don’t have to add anything. For those who can’t afford a Vitamix, the Ninja is the way to go. We got ours for $120. I make smoothies with broccoli and carrots, it crushes ice into snow, and peanut butter comes out perfect. I am in love 🙂
Is there a way that you can store this longer term and not in the refrigerator? Thanks!
Unfortunately I don’t have a good answer for you. 🙁 I have always stored it in the fridge to prevent oil separation, so haven’t played around with other storage methods.
As soon as my store bought peanut butter is finished, I’m making some home made. I love peanut butter, home made should be even better. Thanks for the tips.
I’d guess the blender isn’t powerful enough. Something like the Vitamix or Blendtec that has a stronger motor, plus different speeds to really whip it.
i tried this and it didnt work for me. I have a hamilton beach food processor that only has one speed and i used fresh shelled peanuts and coconut oil. the consistency was crumbly like cookie dough or something. what did i do wrong? any suggestions?
Sometimes you need to keep processing to achieve desired consistency. Did you give it 5 minutes or more?
I blended it for around ten minutes and the consistency never changed. I tried it a second time and got the same result… 🙁
Try a blender? I use about 2 cups shelled peanuts and maybe a tablespoon of honey in my blender and it does that crumbly cookie thing at first but as you help it along (pushing the sides back down gently), you can see it starting to look right at the bottom.
Great article!
Jeff, I have not experimented with other nut butters yet, but I made lots of “nut meat” with my Vita-Mix last summer when Matt and I tried out a raw food diet. It is indeed a fabulous machine! Start saving your pennies! 😉
I’ve been making my own peanut butter for a while. The first time, I had run out of store bought, but had a bunch of those snack packs of nuts that my kids wouldn’t eat. Threw them in my food processor & 7 minutes later, viola! peanut butter. My kids loved it & it was SSSOOOOO easy! Now I get almonds, walnuts, cashews & pecans in the mix too. Depends on how I’m feeling when I go nut gathering. I like to roast them first so you don’t have to add any oil and it really brings the flavors out.
I must add, saying it will last several months is quite funny to me. It doesn’t last 2 weeks in this house! 😉
I love it that you get so creative with your nut butter! I’ll have to get more adventurous next time I make it & try out some new combinations.
Btw…we have never been able to make one batch last longer than a few weeks in this house either! 🙂
I’d actually like to phase peanut butter out of our house as I personally don’t think peanuts are as good for us as real nuts are….but it ain’t happening anytime soon due to dc & dh. Sooo, I too add other healthy things into the butter, but at present lay heavy with the peanuts to keep that pretty much the overpowering flavor. I easily sneak in sesame/pumpkin/sunflower seeds, and now I’m sneaking in some kelp or other seaweed granules. As long as you keep it on the lighter side, nobody is the wiser for it except you!!!
PS I love my Blentec!
What type of oil do you recommend using?
Also, if I wanted to add ground flax seed, would I need to adjust the recipe at all? How much should I add?
Peanut oil would be best (for the flavor), but any neutral-flavored oil like sunflower or canola would work too.
You should not need to adjust the recipe if adding flax seeds. Try with a small amount at first (a few Tbsp) to be sure you like it. It just depends on your preference. Have fun with this! 🙂
Wow! This is so easy…I may have to try it …great information! Thanks! I’ll be on the lookout for the right peanuts.
Hugs, GraceinAZ
Just fyi, the peanuts I happened to have in my pantry were Planters cocktail peanuts. They listed only peanuts, sea salt, and “peanut and/or cottonseed oil.” Sounds good to me! If anyone has any secret info, though, please let me know!
You lucked out Carrie! Sounds safe to me! 🙂
I really did! Woot! 🙂
PS – Oh yes! And adding things! I can add wheat germ and flax seed to this, too! 🙂 Perfect!
Yes! Great idea Carrie! Way to kick it up a notch. 🙂
Thank you so much for this!!! I had just a day or two ago started wondering (when we were running out of pb) “…I wonder how one might make their own peanut butter…?” and this morning I saw the subject of your email, and actually got really excited. 🙂 Seeing that we are now OUT of peanut butter and my son needs lunch before kindergarten – and I actually have peanuts in my pantry! – I am off right. this. minute. to dump those peanuts in the blender. Perfect. Thank you, thank you, thank you! 🙂
@ Carrie
I’m absolutely amazed you’re allowed to send peanut butter to school with your child!
Here, they’ve banned ALL nuts completely
(though they still let me in lol)
Great post! I just wanted to also add that you can make many kinds of nut and seed butters. I really like raw cashew butter and raw sunflower seed butter. You use the same method, and as stated above you would want to soak the raw nuts or seeds (its best to google what kind of nut or seed to see the soak time, some require a few hours and longer can make them rancid) Its so easy and so much healthier to make your own nut and seed butters! Thanks again for the post.
Great post! I’d like to add one more step, though, that will make the peanut butter more healthful: Peanuts, like all legumes (and seeds and nuts and grains), contain phytates, powerful enzyme-inhibitors which, when not processed properly, will bind with the minerals in the foods you’ve just eaten and carry them right on out of your body without you getting a chance to assimilate and benefit from them. So….. Before you blend/grind up the peanuts, soak them overnight (unless they were already roasted–might not do any good then, but I don’t know for sure) in a bowl full of water plus a tablespoon or so of salt. (This salt is not for flavor but for mold inhibition and help in de-phytating the nuts.) Then drain all this off and either grind the peanuts into peanutbutter right away or stick them in a dehydrator or very low oven until they are roasted. (Roasted provides the best, most traditional flavor.) I’ve also been told that Valencia peanuts tend to have less mold problems compared to other kinds of peanuts. Mold (ususally not visible) is the reason a lot of people have problems with peanuts. Maybe this is b/c peanuts are grown underground?
Great info, thanks Nancy.
Do you need to store the peanut butter in the refridgerator? How long will it keep?
Yes, refrigerate your peanut butter to prevent oil separation. It lasts several months if refrigerated.
Oh, refrigerating! Neat idea. Ours sure isn’t lasting long (going through it so fast and my blender only makes about 2 cups at a time with all those peanuts), but this might keep it longer. I put it in the pantry and it only separated so much that a quick stir with the knife took care of it. It was funny, my 14yo was like “um…the peanut butter is watery…” before knowing that I’d made it myself. 🙂 I tell you what, though – a spoonful of this peanut butter with a bunch of chocolate chips on top is WAY better (to me, anyway) than regular Jif!
I recently purchased a Vitamix and love it! I made almond butter last week. Yum! No more expensive grind-you- own for us when we can grind our own. For the almond butter using 3 cups of almonds, it took 5 minutes to make butter. No olive oil. That would really change the taste.
Your article comes at the perfect time. I just got a Vitamix and was boycotting buying peanut butter because its like 8 dollars for a jar. I knew you could make it with this machine, but was unsure of the type of peanuts to use. I had a jar of dry roasted unsalted in my hand too, with nothing else on the ingredient list, but put it back down until I did some more reading. Thanks for posting. I actually just made some almond nut butter but added some extra virgin olive oil to it instead of coconut oil…. its tastes ok, but didn’t like adding 1/4 cup to it. I still have lots to learn on my machine… If you have any thoughts on better almond butter…i’m all ears. Also was wondering if you have a section here on things you have made with your Vitamix.
The almonds will take longer in the Vita-Mix, but oil shouldn’t be necessary. I do not have a section on the website dedicated to my Vita-Mix recipes, but that’s a great idea! 🙂
Thanks for the quick reply’s and also the great ideas from everyone else. I guess because the machine is still so brand new, I was afraid I’d reck it. I definetely didn’t give it much time to do its thing before adding the EVOO. It does still taste good, but next time I’d like to give it a go with just the nuts.
My fingers are crossed you do a Vitamix section! Even though I have the cookbook that came with the machine…its not the same as seeing or hearing what someone actually did in the blender……
Debora — One day my VitaMix overheated and shut off. I was desolate. I rushed to Costco where the VitaMix show was in town and spoke to the guy doing the demo, telling him my tale of woe. He said “You do NOT need a new VitaMix. I’ve never heard of one burning out. Ever.” I bought a new one anyway, knowing that mine was kaput. Turns out, when I got home, it worked fine, so I returned to new one unopened. VitaMix is a really sturdy workhorse…and if you should screw it up (although I don’t know how you could), they have a really customer friendly replacement policy.